
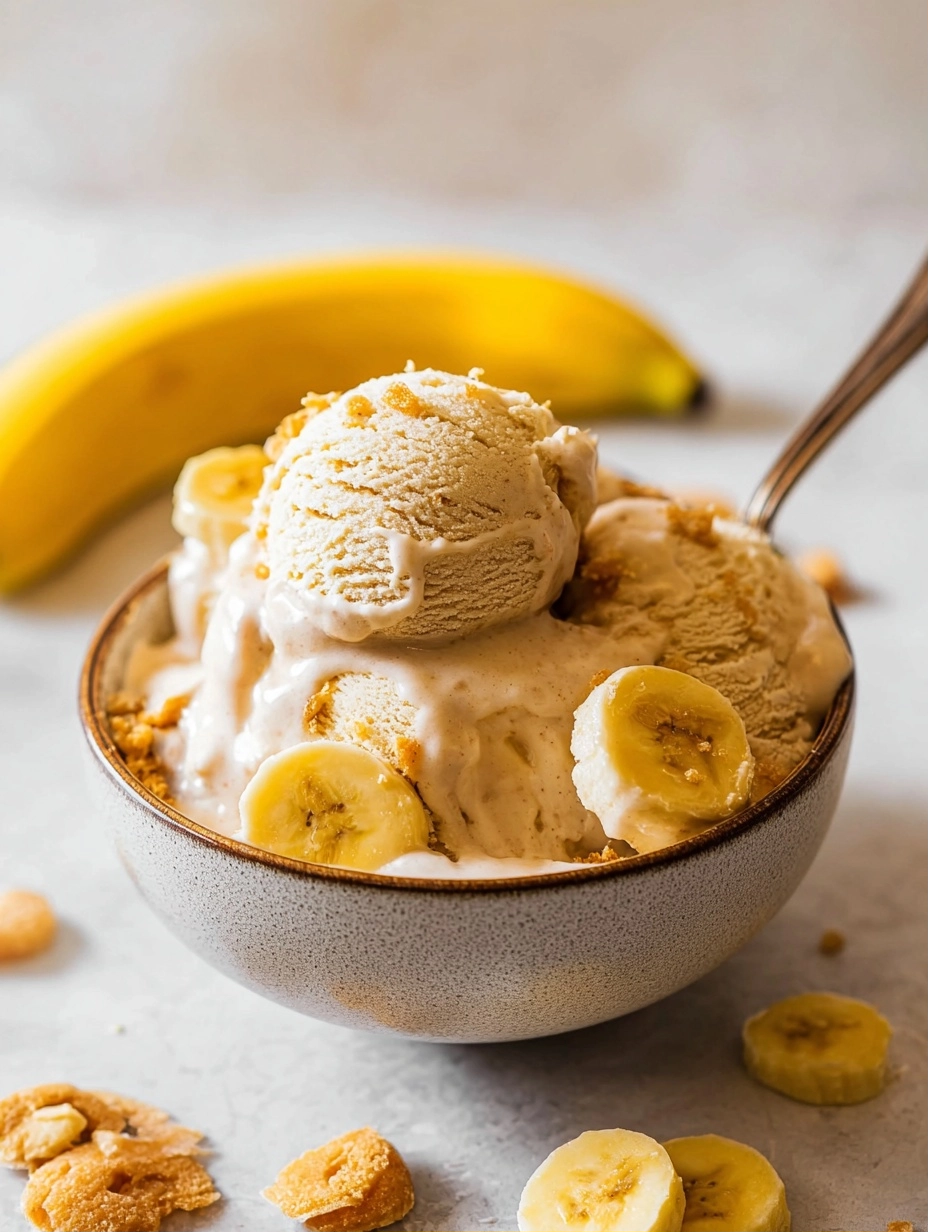
Satisfy your sweet tooth while smashing your fitness goals with this High-Protein Banana Pudding Ice Cream. This recipe transforms a classic Southern dessert into a lean, cold treat using the revolutionary Ninja Creami technology. Unlike traditional ice cream makers that churn while freezing, the Ninja Creami uses a specialized blade to shave a completely frozen block into a silky, creamy masterpiece.
By utilizing high-protein milk and premium whey powder, you enjoy a decadent texture without the excess fat and sugar found in store-bought pints.
Why This Recipe Works for Your Lifestyle
Finding a balance between health and flavor often feels like a chore. However, this Banana Pudding Ice Cream bridges that gap perfectly. The natural sugars from the ripe banana provide a rich sweetness that complements the vanilla protein powder. Because we use high-protein milk, each serving delivers a substantial 17 grams of protein, making it an ideal post-workout snack or a guilt-free late-night treat.
Furthermore, using gluten-free vanilla wafers ensures that those with digestive sensitivities can partake in this nostalgic flavor profile without worry.
Detailed Nutritional Breakdown
Understanding what goes into your body is essential for maintaining a healthy lifestyle. Below is the nutritional profile for one serving of this delicious protein ice cream.
| Nutrient | Amount per Serving |
|---|---|
| Calories | 242 kcal |
| Protein | 17 g |
| Total Fat | 6 g |
| Carbohydrates | 30 g |
| Fiber | 3 g |
| Sugar | 15 g |
| Sodium | 162 mg |
The Essential Ingredients
To achieve the perfect scoop, you need high-quality ingredients. We recommend Organic Valley Protein Plus Organic 2% milk because its filtered process naturally increases protein content without adding artificial additives. For the protein powder, use a high-quality vanilla whey. Whey protein is particularly effective for the Ninja Creami because its molecular structure helps create a smooth emulsion during the high-speed Lite Ice Cream cycle.
Make sure your banana is very ripe; the more brown spots it has, the sweeter and more intense the flavor of your finished ice cream will be.
Step-by-Step Instructions for Perfection
Phase 1: Preparation and Freezing
First, combine your liquid base, the ripe banana, and the vanilla protein powder. Do not simply stir these together with a spoon. For the best macro-distribution and texture, use an immersion blender or a standard high-speed blender. This process aerates the mixture and ensures the banana is completely liquefied.
Pour the mixture into your Ninja Creami pint, being careful not to exceed the Max Fill line. Freeze the pint on a completely level surface for at least 8 hours, though 24 hours is the gold standard to ensure the crystals are fully set.
Phase 2: The Spinning Process
Remove the pint from the freezer and lock it into the outer bowl assembly. Select the Lite Ice Cream cycle. This specific setting uses a faster blade speed to break through the icy texture of high-protein, low-fat mixtures. Once the cycle finishes, check the consistency.
If it looks dry or crumbly, don’t worry. This is common with protein-based recipes. Add one tablespoon of milk and run the Re-Spin cycle. This second pass creates that signature soft-serve texture everyone loves.
Phase 3: The Mix-In Magic
Now comes the classic banana pudding element. Use a spoon to create a deep well in the center of your churned ice cream. Drop in your crushed vanilla wafers. Place the pint back into the machine and select the Mix-In cycle.
This function pulses the blade to distribute the cookie chunks without pulverizing them into dust, giving you satisfying bites of crunch throughout the pint.
Expert Ninja Creami Tips and Hacks
If you find that your ice cream has a hump in the middle after freezing, always scrape it flat with a spoon before processing. Applying the blade to an uneven surface can damage the machine. Additionally, if you prefer a thicker, more ‘hard-pack’ style ice cream, you can place the finished pint back in the freezer for 15 minutes after the Mix-In cycle.
For those who want more volume, adding a tiny pinch of guar gum or xanthan gum (about 1/4 teaspoon) during the initial blending phase can create an even fluffier, commercial-grade texture.
Flavor Variations and Toppings
While this recipe focuses on the classic banana pudding profile, you can easily customize it. For a Peanut Butter Banana twist, add a teaspoon of powdered peanut butter to the base. If you want a Chocolate Banana experience, swap the vanilla protein for chocolate whey.
For toppings, consider fresh banana slices, a drizzle of honey, or a dollop of dairy-free whipped topping. Always remember to log your toppings if you are tracking macros, as extra cookies or syrups can quickly change the caloric density of the dish.
Ultimately, the Ninja Creami empowers you to control every ingredient in your dessert. This High-Protein Banana Pudding Ice Cream proves that you don’t have to sacrifice flavor to maintain your health. By following these steps, you will enjoy a creamier, tastier, and healthier version of your favorite childhood dessert.
The Recipe
PrintHigh-Protein Banana Pudding Ice Cream (Ninja Creami)
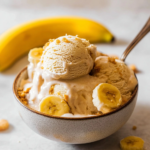
A delicious, creamy, and high-protein alternative to traditional banana pudding ice cream, made easily in the Ninja Creami.
- Prep Time: 10 min
- Cook Time: 0 min
- Total Time: 8 hr 10 min
- Yield: 2 servings 1x
- Category: Dessert
- Method: Ninja Creami
- Cuisine: American
- Diet: High Protein
Ingredients
1 cup high protein milk
1 ripe banana
1 scoop vanilla whey protein powder
8 crushed gluten-free vanilla wafers
1–2 tablespoons extra milk for re-spinning
Instructions
- Combine high protein milk, ripe banana, and vanilla protein powder in a Ninja Creami pint.
- Blend using an immersion blender until the mixture is completely smooth.
- Place the lid on the pint and freeze on a level surface for 8 to 24 hours.
- Place the frozen pint into the Ninja Creami machine and run the ‘Lite Ice Cream’ cycle.
- Add 1 tablespoon of milk and run the ‘Re-Spin’ cycle to achieve a smooth consistency.
- Create a well in the center of the ice cream, add the crushed vanilla wafers, and run the ‘Mix-In’ cycle.
- Serve immediately with fresh banana slices or extra wafers if desired.
Notes
- If the ice cream is still powdery after the first re-spin, add another tablespoon of milk and re-spin again.
- Use extremely ripe bananas for the best natural sweetness.
Nutrition
- Serving Size: 1/2 pint
- Calories: 242 kcal
- Sugar: 15 g
- Sodium: 162 mg
- Fat: 6 g
- Saturated Fat: 2 g
- Unsaturated Fat: 4 g
- Trans Fat: 0 g
- Carbohydrates: 30 g
- Fiber: 3 g
- Protein: 17 g
- Cholesterol: 45 mg